LoRaWAN: The Things Network Setup: Difference between revisions
No edit summary |
No edit summary |
||
| Line 15: | Line 15: | ||
# Navigate to: https://www.thethingsnetwork.org/ | # Navigate to: https://www.thethingsnetwork.org/ | ||
# Click on Sign Up or Get Started | # Click on Sign Up or Get Started | ||
# Select the things network and sandbox option as seen in Figure 13 [[File:TTN1.png|600px|frame | # Select the things network and sandbox option as seen in Figure 13 [[File:TTN1.png|600px|frame|Figure 13: Select the left option.]] | ||
# Create an account and log in. | # Create an account and log in. | ||
# Navigate to the console (Figure 14) [[File:TTN3.png|thumb|Figure 14: Navigate to the console.]] | # Navigate to the console (Figure 14) [[File:TTN3.png|thumb|Figure 14: Navigate to the console.]] | ||
Revision as of 15:02, 17 June 2025
Summary
This documentation focuses on the setup and implementation of the EUIs in the makefile
Overview
In this task, we want to connect the STM32 board with The Things Network (TTN). The connection to the TTN happens through a gateway as seen in Figure 12.

The Things Network Setup
To connect the board with TTN, we first need to create an account on TTN:
- Navigate to: https://www.thethingsnetwork.org/
- Click on Sign Up or Get Started
- Select the things network and sandbox option as seen in Figure 13
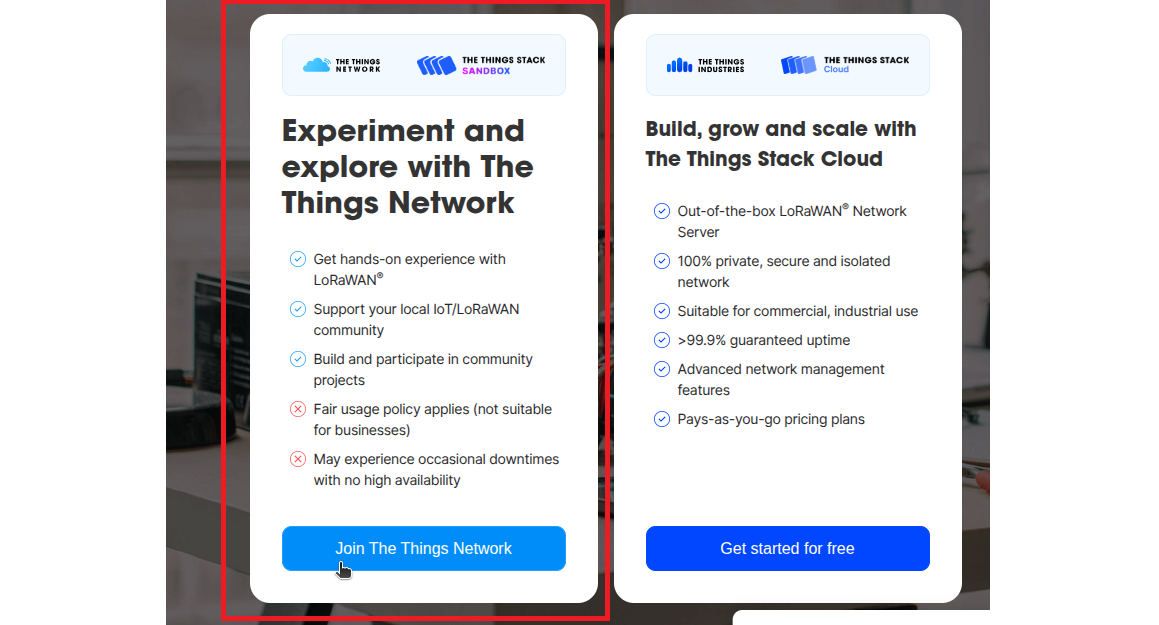
Figure 13: Select the left option. - Create an account and log in.
- Navigate to the console (Figure 14)
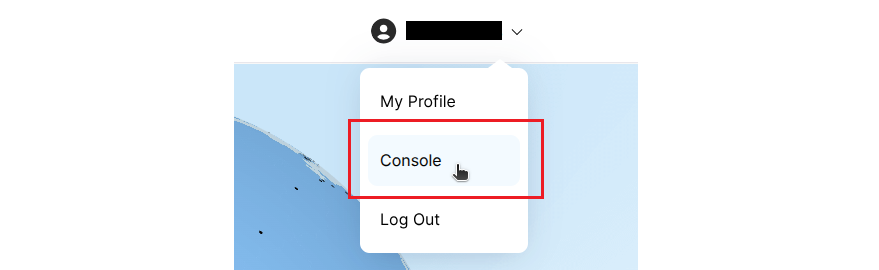
Figure 14: Navigate to the console. - Choose the Europe network cluster


Next, we need to set up the application:
- Click on “Create application” (Figure 15)
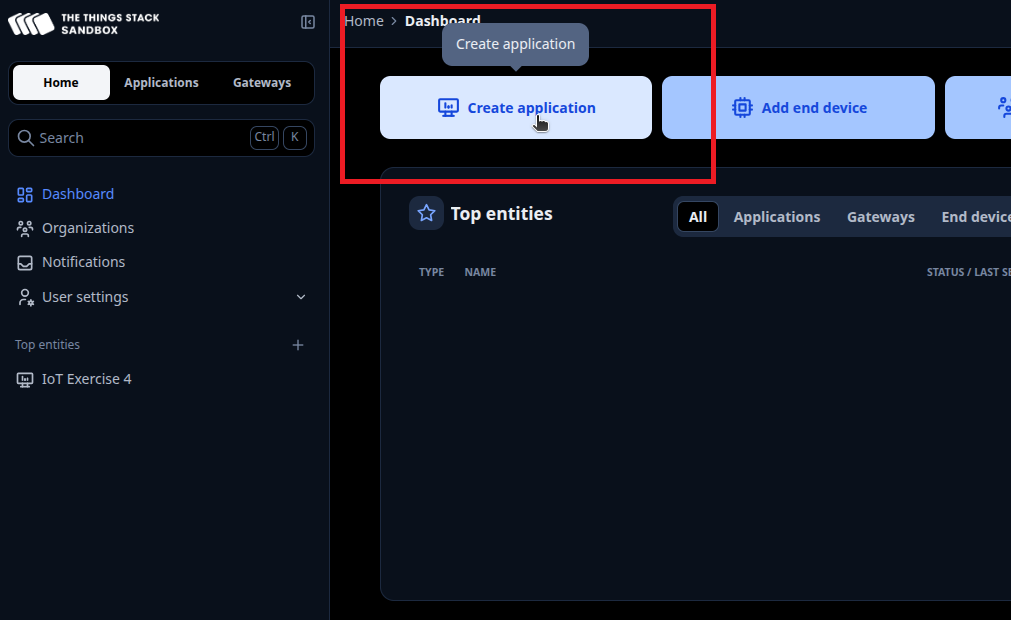
Figure 15: Create a new application. - Choose a unique application ID for the application. Application name, description and Label are optional (Figure 16)
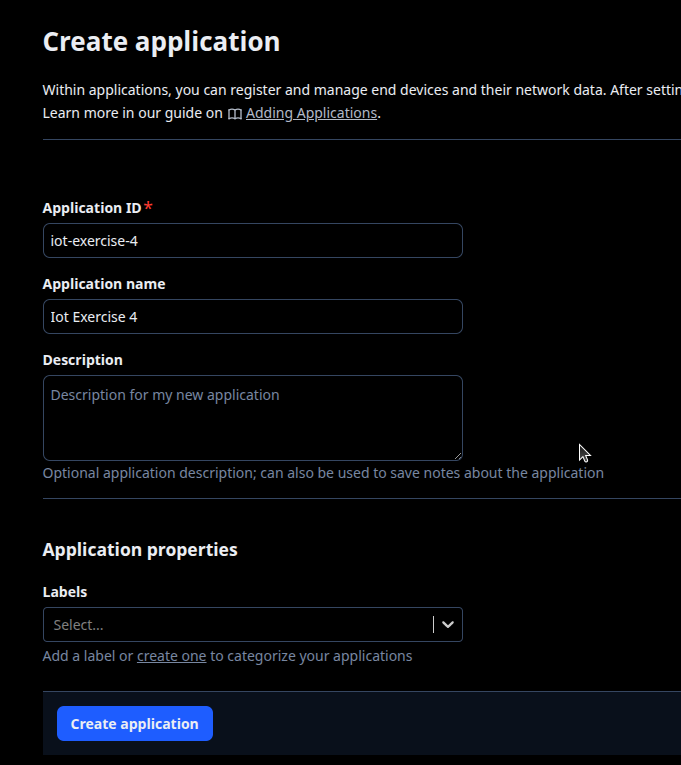
Figure 16: Create a new application. - Click on "Register end device”
- Select Enter end device specifics manually and select the Frequency plan, LoRaWAN version, and Regional Parameters version as seen in Figure 17.
- For the JoinEUI enter all 0s and confirm the settings.
- Now you can generate a DevEUI and AppKey and give the device an End device ID (Figure 18).
- Click on "Register end device”, which should bring you back to the end device overview (Figure 19).


Before we can build the application that is sending the data, we now need to change the payload we want to receive to CayenneLPP so the message is formatted and read correctly. These settings need to be changed in the device settings (Figure 20) and in the application settings (Figure 21) - make sure to set them for Uplink and Downlink.


Implementation in Makefile
Now we can use the program where we read the temperature and humidity, and send the data to TTN.
- Navigate to
/myRIOT/examples/misc/lorawan - This folder contains a LoRaWAN program
- Create a copy of the lorawan directory and rename it to the desired program name using the following command:
it-security@host14: cp /myRIOT/examples/misc/lorawan /myRIOT/examples/misc/lorawan-hts221
In the Makefile, add the lines of code marked in Figure 22. Change the application name on line 2. Next, add the DEVEUI (JoinEUI in TTN), APPEUI, and APPKEY, which we generated in TTN.

Used Hardware
STM32 LoRa and Sigfox Discovery kit + X-NUCLEO IKSO1A2 expansion board